-
Spring boot 초기 세팅 및 DB 연결개발/개발일지 2023. 12. 3. 20:43
portpolent의 백엔드를 위해 Spring Boot와 DB를 설정하고 연결해 HTTP 요청을 잘 처리하는지 확인한다. IntelliJ Ultimate와 MariaDB를 사용한다.
Spring Boot 프로젝트 시작하기
인텔리제이에 spring boot프로젝트를 바로 만들 수 있는 기능이 있어서 그걸 사용했지만 https://start.spring.io/ 에서 생성해도 동일하다. 자바는 17 버전, Gradle은 Kotlin, 프로젝트 언어는 자바, 스프링 부트 3.2 버전을 사용한다.

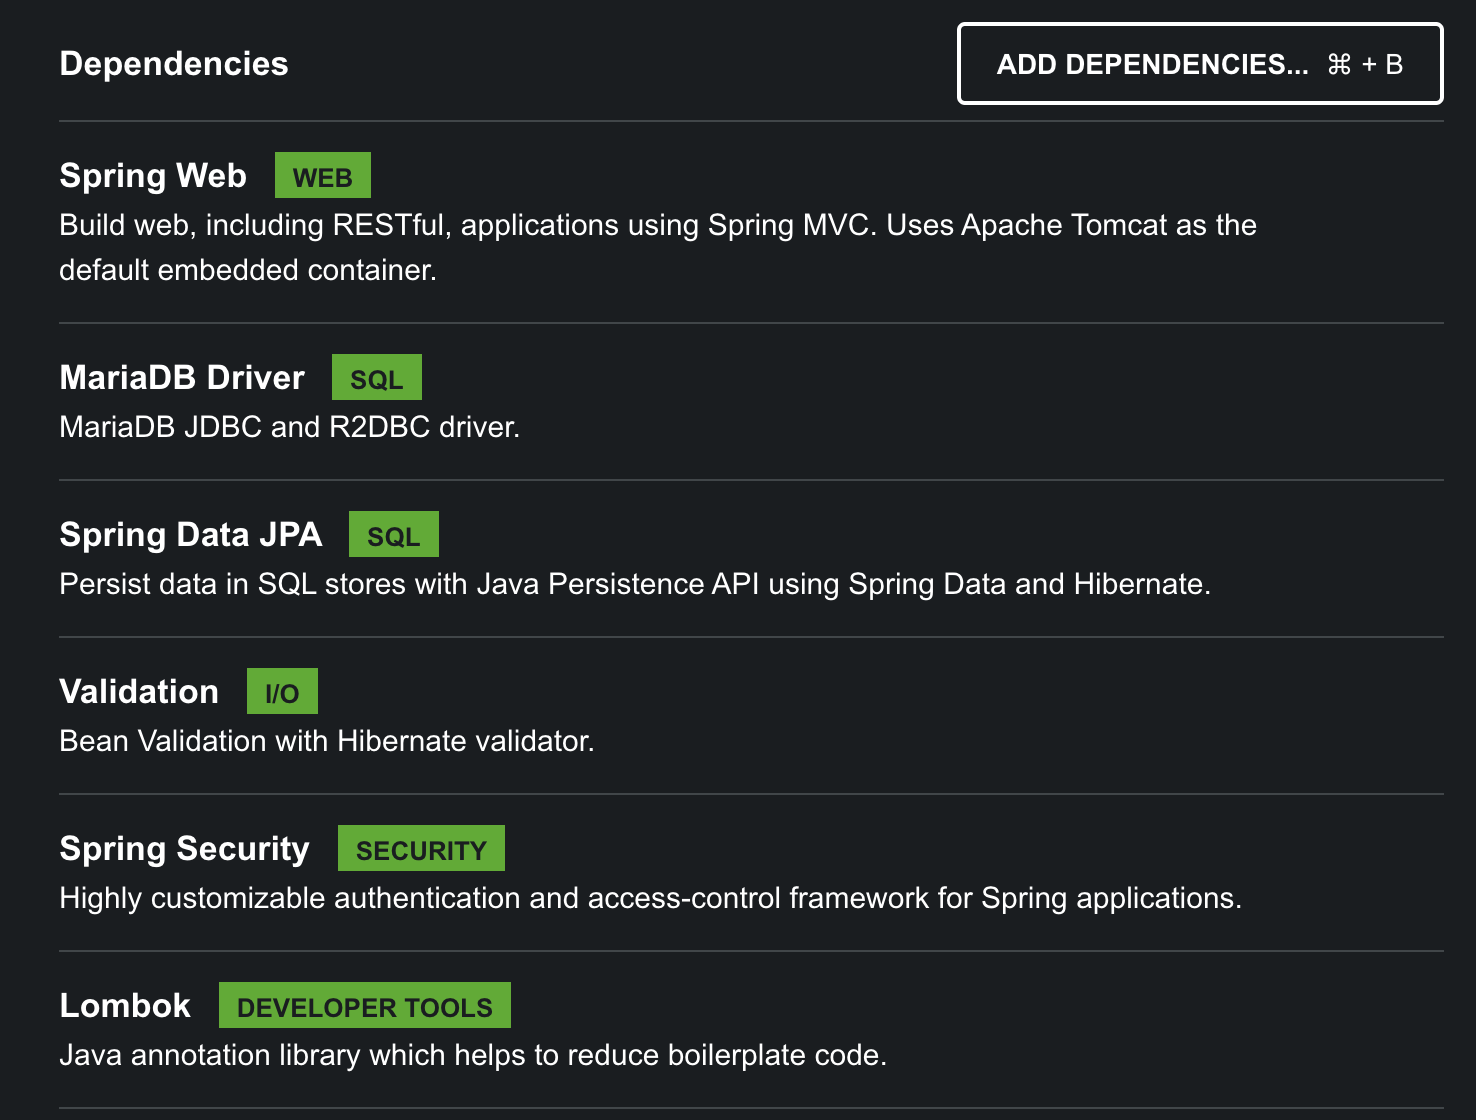
개발에 필요한 여러 의존성도 같이 추가한다.
- Web
- MariaDB Driver
- JPA
- Validation
- Security
- Lombok

DB 연결하기
JPA를 추가하고 스프링 프로젝트를 실행하면 오류와 함께 바로 종료된다. DB와 연결에 실패했기 때문이다. application.properties에 아래 내용을 추가한다.
spring.jpa.show-sql=true spring.jpa.hibernate.ddl-auto=update spring.datasource.driver-class-name=org.mariadb.jdbc.Driver spring.datasource.url=jdbc:mariadb://localhost:3306/portpolent spring.jpa.open-in-view=false spring.datasource.username=portpolent spring.datasource.password=portpolent-db- spring.jpa.show-sql : 쿼리되는 SQL을 볼 수 있다. logger에 찍히진 않는다.
- spring.jpa.hibernate.ddl-auto : Entity가 변경되었을 때 어떤 작업을 수행할지 설정한다. update는 자동으로 변경된 내용에 맞춰 갱신한다. 다만, 실제 배포용 빌드에서는 다른 옵션을 사용하는 것이 좋다.
- spring.datasource.url : 데이터베이스의 URL이다. portpolent라는 이름으로 데이터베이스를 미리 생성해 놔야 한다.
- spring.datasource.username, password : DB에 접근하는 username과 password이다. 데이터베이스에 읽기, 쓰기 권한이 있어야 한다. 당연히 실제 빌드에서는 다른 username과 비밀번호를 사용하는 것이 좋다.
* 참고 MariaDB에서 유저를 생성하는 법
CREATE USER 'portpolent'@'localhost' IDENTIFIED BY 'portpolent-db';localhost에서만 접근할 수 있는 portpolent라는 유저를 만들어 비밀번호를 portpolent-db로 설정한다.
GRANT ALL PRIVILEGES ON portpolent.* TO 'portpolent'@'localhost';portpolent 데이터베이스의 모든 권한을 portpolent유저에게 부여한다.
FLUSH PRIVILEGES변경된 권한을 반영한다.
DB 설정까지 완료하면 이제야 프로젝트를 실행할 수 있다.
HelloController 만들기
정상적으로 HTTP 요청을 받을 수 있는지 테스트하기 위해 간단한 컨트롤러를 하나 만든다.
package io.yeahx4.portpolent.controller;

import org.springframework.web.bind.annotation.GetMapping;
import org.springframework.web.bind.annotation.RequestMapping;
import org.springframework.web.bind.annotation.RestController;

@RestController
@RequestMapping("/hello")
public class HelloController {
    @GetMapping("/")
    public String hello() {
        return "Hello World";
    }
}
참고로 GetMapping에 /를 했기 때문에 /hello에 요청을 보내면 404 Not Found가 나온다. /hello/에 보내야 정상적인 응답을 얻을 수 있다. GET 요청을 보내면 Hello World를 기대했지만 그렇지 않다. Spring Security를 같이 추가했기 때문에 CORS에 의해 차단된다.
CORS 해결하기
Spring Security를 추가하면 기본적으로 여러 보안이 제공된다. 그중에는 REST API에는 필요 없는 것도 있고 수정할 필요가 있는 것도 있다. 옛날 버전의 Spring Boot에서는 WebMvcConfigurer 인터페이스를 구현해서 오버라이딩하는 방식으로 설정했지만 Bean을 사용하는 방향으로 변경되었다.
@EnableWebSecurity
@Configuration
public class SecurityConfig {
    @Bean
    public SecurityFilterChain filterChain(HttpSecurity http) throws Exception {
        return http
                .httpBasic(it -> it.disable())
                .csrf(it -> it.disable())
                .build();
    }

    @Bean
    public CorsConfigurationSource corsFilter() {
        UrlBasedCorsConfigurationSource source = new UrlBasedCorsConfigurationSource();
        CorsConfiguration config = new CorsConfiguration();

        List<String> origins = Arrays.asList(
                "http://localhost",
                "http://localhost:3000"
        );

        config.setAllowCredentials(true);

        for (String origin : origins) {
            config.addAllowedOrigin(origin);
        }

        config.addAllowedHeader("*");
        config.addAllowedMethod("*");

        source.registerCorsConfiguration("/**", config);

        return source;
    }
}
Spring Security에서 기본으로 제공되는 httpBasic과 csrf 방어를 제거한다. UrlBasedCorsConfigurationSource를 통해 요청을 수락할 URL을 한정한다. OpenAPI가 아닌 이상 모든 origin에서 요청을 받는 것은 위험하다. CORS가 있어도 XSS 등의 취약점에는 위험할 수 있다.
모든 것을 설정하고 정말로 GET 요청을 날려 본다.

'개발 > 개발일지' 카테고리의 다른 글
[Spring Boot] 에러 메세지 커스터마이징 하기 (0) 2023.12.14 [Spring Boot] 값 검증하기 - Spring Validation (0) 2023.12.04